Why Orchard Fruit Ripens in Waves
Why orchard fruit ripens in waves: compare canopy positions and fruit signs so you can pick ready produce while leaving later fruit to mature.
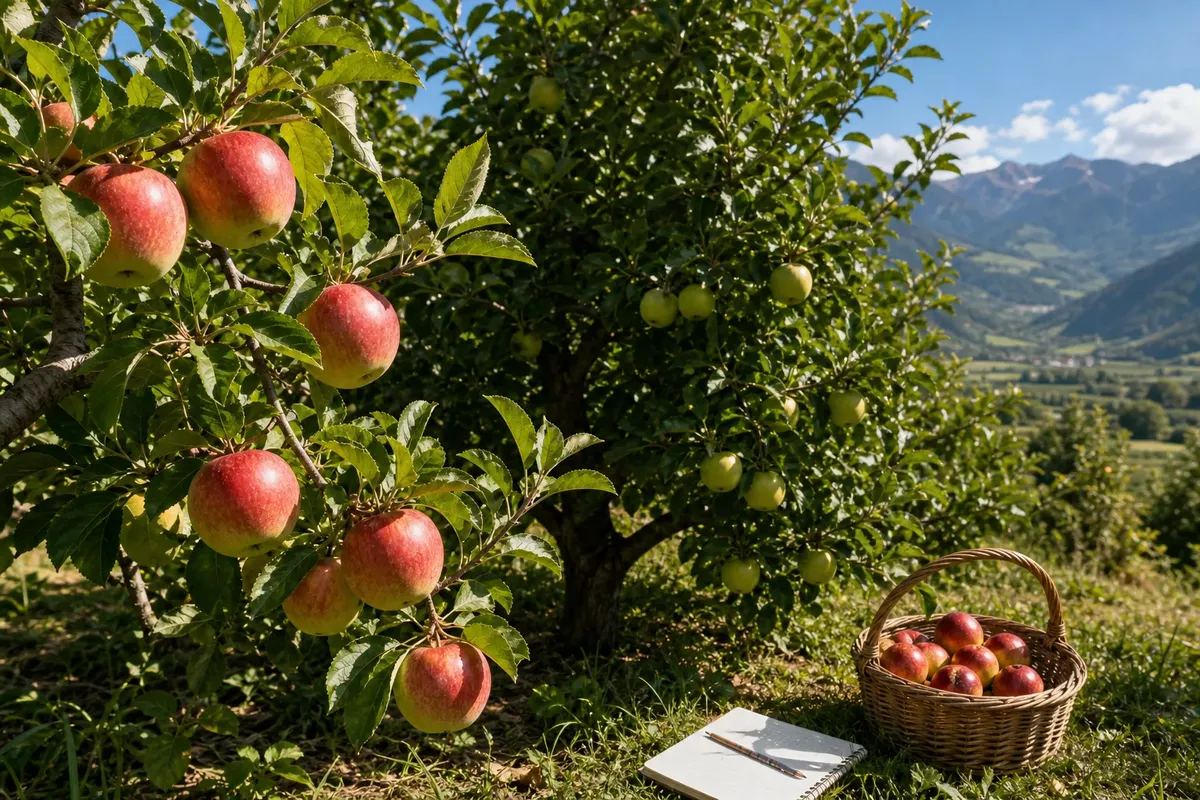
Why orchard fruit ripens in waves: compare canopy positions and fruit signs so you can pick ready produce while leaving later fruit to mature.
Harvests · 6 min read
Why orchard fruit ripens in waves is easy to see when one sunlit apple lifts free while a shaded neighbour stays firm and sharp. A tree can hold fruit at different stages, so inspect the fruit itself rather than treating the whole canopy as one batch.
Start with where each fruit grew, then compare its colour, feel, smell and ease of release. Pick only what suits your intended use, and leave sound fruit that is not ready. A short note about the part of the tree you checked can make a return visit simpler.
Why does orchard fruit ripen in waves?
Fruit across one tree does not receive identical conditions. Outer branches may get more direct sunlight; the inner canopy is often shaded by leaves or nearby limbs. Height, branch angle and the direction a branch faces also affect exposure.
Development varies too. Blossoms do not all open at once, and fruit set at different times may mature at different times. Variety and seasonal conditions also shape the pace. The result is a gradual spread of readiness, not a sharp boundary between ripe and unripe fruit.
For a valley orchard, that variation matters at harvest: a sunny edge, sheltered centre and lower limbs can each offer different clues. Treat the tree as several small picking areas, not one uniform crop.
Where should you inspect first?
Begin with accessible fruit on exposed branches, then compare it with fruit just inside the canopy. Look at higher and lower limbs and at different sides of the tree. Exposure helps you choose where to inspect; it does not decide whether a fruit is ready.
- Outer branches: If exposed fruit looks further along than fruit behind the leaves, assess the exposed fruit individually; otherwise compare another part of the canopy before picking.
- Shaded interior: If the fruit remains firm or lacks the variety’s familiar signs, leave it attached and check it later; if it shows several suitable signs, assess it for picking.
- Different heights: If upper and lower fruit differ in colour or feel, treat them as separate areas; if they seem alike, still check individual fruits before gathering.
- Sun-facing and sheltered sides: If one side appears further along, pick only fruit that passes your readiness checks; if there is no clear difference, use the fruit’s condition rather than its position.
- Clusters and single fruit: If touching fruit is less developed or shows pressure marks, leave or sort it according to its condition; if it is sound and ready, handle it gently.
- Reach and footing: If fruit is beyond comfortable reach, leave it for someone with suitable equipment; if you can reach it safely from stable ground, pick without pulling branches sharply.
Hold each fruit gently and avoid bending a branch sharply. Do not climb or stretch with a loaded basket. If a limb is beyond comfortable reach, leave it for someone equipped to reach it safely.
How can you tell which fruit is ready?
Use several signs together. Colour can help, but some varieties retain green patches as they become ready, and a red blush alone is not enough. Look for a colour change familiar to that variety, a fuller aroma and fruit that feels sound rather than soft or damaged.
For apples and pears, lift and turn a fruit lightly. One that is ready to pick may separate more readily than one that remains firmly attached. Do not tug or twist with force; a stubborn fruit may need more time, though varieties differ.
If you have permission to sample, taste a sound fruit from the area you are assessing. Judge whether its flavour and texture suit eating fresh, cooking or another intended use. One fruit cannot speak for every branch.
Follow the orchard owner’s instructions and variety-specific advice, especially for picking and storage. General signs for apples may not suit pears, plums or other crops.
How should you handle a tree with fruit at mixed stages?
Choose one accessible area, such as a sunny outer branch, and assess a few fruits before gathering. Put sound, ready fruit in a clean, shallow container to limit pressure and bruising. Keep damaged fruit apart from any batch intended for storage.
- Choose a small area. Select one side or level of the canopy so you can compare like with like.
- Inspect representative fruit. Compare colour, firmness, aroma and ease of release; sample only where permitted.
- Pick or leave. Gather sound fruit that suits your intended use; leave firm, underdeveloped or strongly attached fruit on the tree.
- Sort as you go. Separate sound fruit from bruised or damaged fruit, and plan to use suitable damaged fruit promptly.
- Record the area and signs. Write a brief note, such as “outer west side ready; shaded centre firm”, so the next visit starts with the right comparison.
- Return and reassess. Check the remaining areas again; pick them only if their condition has changed enough to meet your chosen signs.
Say you have a small apple tree with eight outer apples that smell fragrant and lift free, while six shaded apples remain pale and firmly attached. You pick the eight outer apples into a shallow basket, leave the six shaded ones on the tree and note “outer fruit picked; centre firm”. On your next visit, you inspect those six again: if they now show the variety’s familiar colour and release gently, you pick them; if they remain firm and attached, you leave them. The decision follows the fruit’s observable condition, not an assumed schedule.
Elaborate maps are not worth the effort for an ordinary garden tree. A concise note about which area you checked and what the fruit did is usually enough to guide the next pass.
What should you do with fruit that is not ready?
Leave sound, firmly attached fruit on the tree and avoid handling it repeatedly. If weather, pests or access make waiting difficult, weigh those conditions against the fruit’s current state rather than stripping the whole tree on a fixed date.
Keep fruit for eating separate from fruit you intend to store. Remove damaged fruit from the storage batch and use it promptly if it remains suitable. Check stored fruit and take out any that begins to soften or spoil. Use the grower’s guidance for storage conditions and crop-specific handling.
Which signs answer common ripening questions?
Does fruit on the sunny side ripen first?
It may reach picking condition earlier because it receives more light, but exposure is only one influence. Compare it with fruit elsewhere on the same tree before deciding what to pick.
Can fruit on one branch ripen at different times?
Yes. Blossoms may set fruit at different times, while leaves and neighbouring fruit create differences in light and development. Assess individual fruits rather than treating a branch as one batch.
Should all the fruit be picked in one visit?
Only if the fruit is ready across the tree and suits a single picking. If parts of the canopy show different signs, pick the ready portion and leave the rest for another pass.
Is colour enough to judge ripeness?
No. Colour can mislead across varieties and growing conditions. Combine it with firmness, aroma, flavour where sampling is allowed, and how readily the fruit separates.
How can you make a return visit useful?
Note the area you checked, the signs you saw and what you left behind. On returning, start with sections that seemed close, then compare their fruit with the shaded or later-setting areas. This keeps each visit focused without assuming every branch has followed the same pace.
Why orchard fruit ripens in waves comes down to differences in exposure, position and development. Check each area, pick sound fruit that meets your signs and leave the rest to be reassessed. A brief note and a gentle hand are often enough to make the next picking decision clearer.
Stay at the table
At the Market: Loose Produce or the Prepacked Box?
Loose produce or a prepacked box? Match market produce to your meal, portion needs and appetite…
How to Harvest and Dry Beans for Pantry Storage
Learn how to harvest and dry beans for pantry storage, sort the crop and decide what…